Pong 2D: Input and State
This is Elympics basics tutorial: part 2/3. In this part we'll be exploring concepts of inputs and state synchronization. See: Part 1.
Ball synchronization
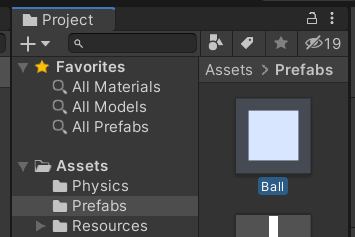
Our work begins in the main element of our game – the ball. First, let's try to modify it so that its position is synchronized for every player. To do that, let's open Ball.prefab located in Assets/Prefabs.
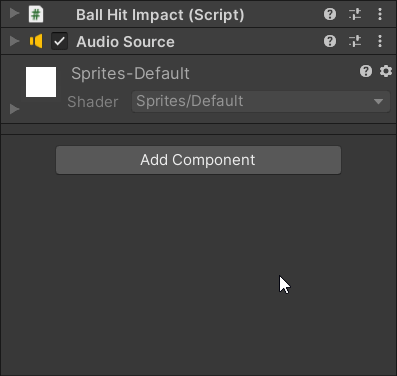
In this prefab we can see some standard components like Sprite Renderer and Box Collider, or scripts responsible for moving the ball. In order to synchronize something with Elympics, we need al objects to use the basic component of Elympics Behaviour. Add it by clicking Add Component in the bottom, and select Elympics Behaviour.
Awesome! Now let's take a look at what we've added.
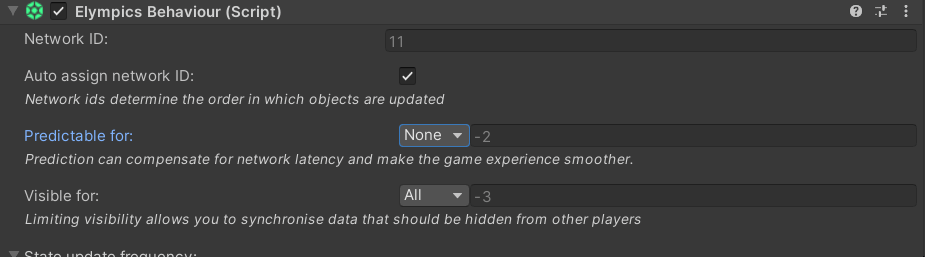
Elympics Behaviourallows to set synchronization settings like prediction, refresh rate, etc.
For now, let's leave those settings at default. We need to add position synchronization, so let's focus on three buttons in the bottom: Add Game Object Active Synchronization, Add Transform Synchronization and Add Rigidbody 2D Synchronization.
Because all ball movement is done using Rigidbody 2D, we only need to add Rigidbody 2D Synchronization, so let's do it!
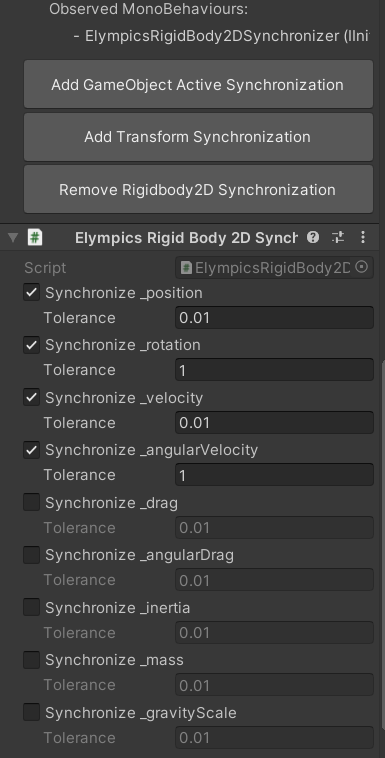
Rigidbody 2D synchronization lets you synchronize physics based objects. Try to add as few synchronizers as possible in order to keep your network bandwidth low.
Elympics Rigidbody 2D Synchronizer was added to the ball object. It allows to tweak synchronization settings and parameters like required precision. For now, let's leave those at default.
That's it! The ball movement will now be fully synchronized between players. Isn't this awesome? Every player connected to the game will be now able to see the current ball position and velocity, the same way as on the server instance!
Half-remote mode
In order to test what we've just created, we'll need to use half-remote mode, which will allow us to host both server and client games between multiple editor instances and/or game builds. In our case, one of the editors will act as a server, and all others will join as players (clients). Here comes a very convenient package bundled with Elympics: ParrelSync.
In order to create another editor, launch ParrelSync -> Clones Manager and add a new clone of your game by clicking Create a new clone.
This can take a while. After it's done, you should be able to see two clones of launchable Unity instances.
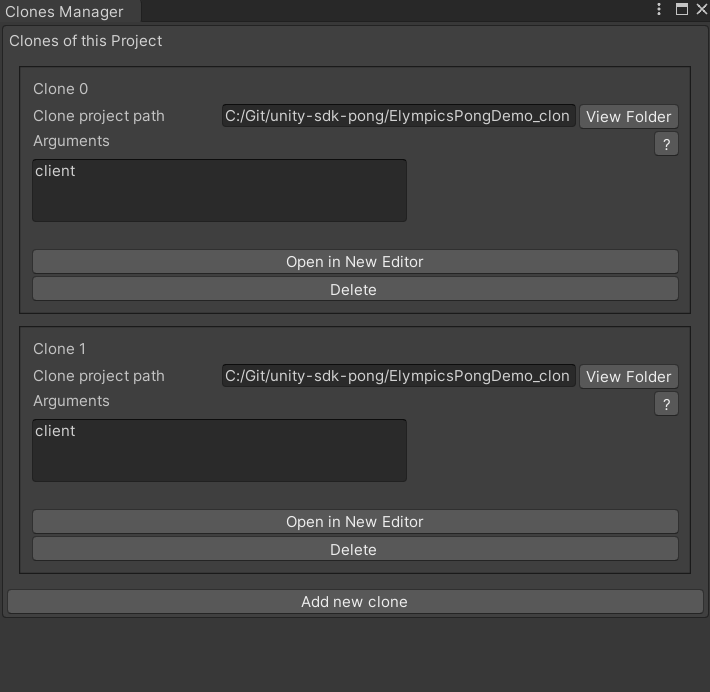
In order to test our ball synchronization, we need only one additional clone (for player 1). So let's Open in New Editor in Clone 0 options – this will launch another Unity editor with the same exact project, that will be the player during our tests.
Remember, that all changes done in the main editor, will be automatically applied in all clones, which will make game testing and debugging much easier.
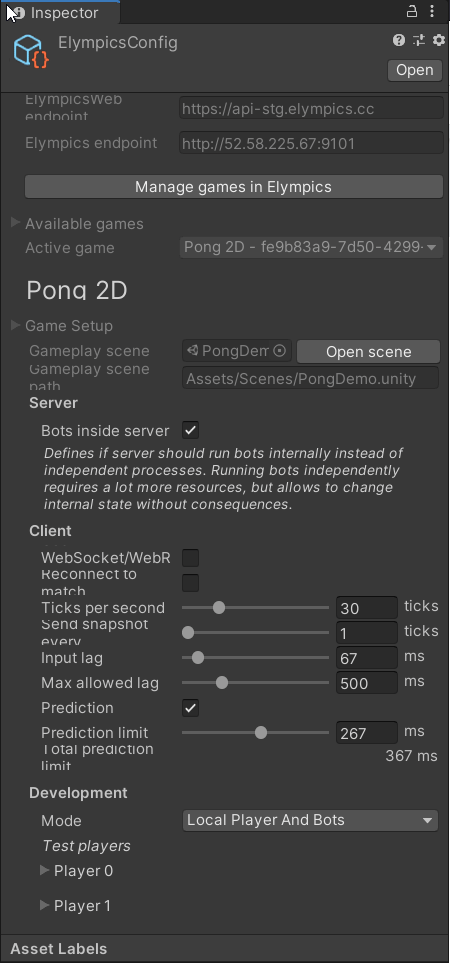
With 2 editors open (root and clone), we need to specify which of those is the server, and which is the client. To do that, let's launch Elympics Config by going to Tools -> Elympics -> Select or create Config.
In that inspector window you should see one ElympicsConfig with all its settings. After scrolling to the bottom, make sure that Mode is selected as Half Remote, and Player 1 should have Is Bot option checked.
So: let's set the main editor as Server in half-remote mode.
The second editor (Player 0), edit the same settings and set it as player, and connect to your loopback localhost IP (the same as in the screenshot below):
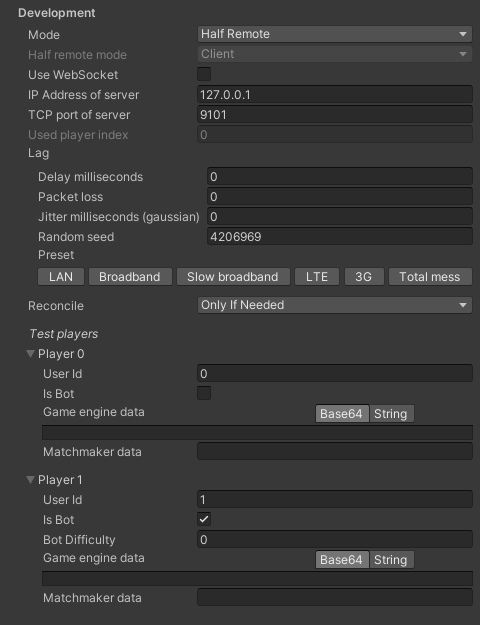
Player 1 should be set as bot, so that we're able to start the game with only one player. Alternatively, you can create another editor clone and launch it as the second player.
That's it! We should be able to test our game! 🎉
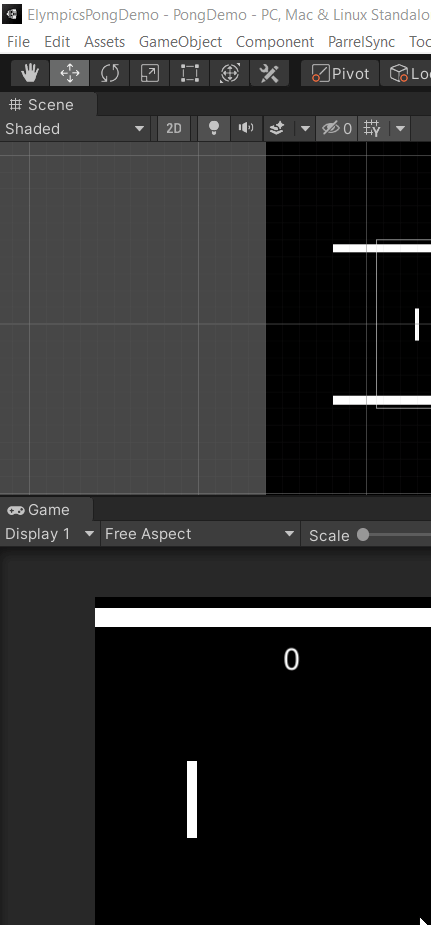
First, start Play mode in the editor that was configured as the server. Once it starts, do the same in the clone editor (player). At first, nothing exciting is happening. However, when you try "playing" in the server editor, you'll see that the ball is bouncing in the client editor as well, despite not hitting the pad! This means, that the ball is now fully synchronized and streamed to the client from the server!
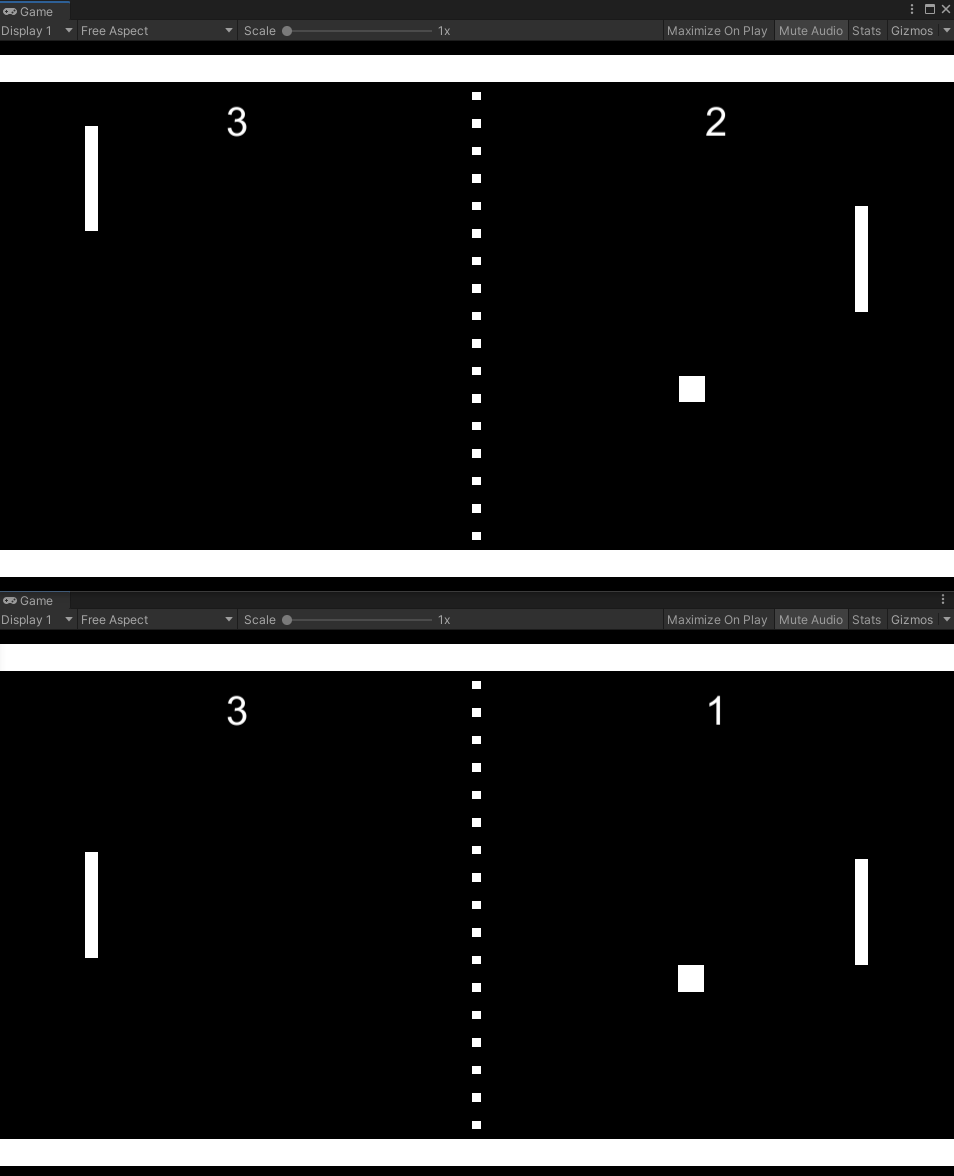

Wow! Position and velocity (so the whole simulation) of the ball is now fully synchronized between instances! 😎 It's time to move to input handling!
Inputs: Moving player pads
Ball synchronization is done! Now, in order to play, we need to assign certain pads to players and allow them to control those pads.
Input handling in Elympics is handles using IInputHandler interface. Let's implement it in our PlayerInputController.cs.
As you can see, in order to handle local hot-seat gameplay, the Update method needed to check which player played the input in order to assign it to the correct pad. With online multiplayer we won't have to handle that case anymore, because each player will have their own keyboard, and send their own input to the server.
Let's start implementing IInputHandler in PlayerInputController. (remember to add using Elympics; clause).
There are two methods that need to be implemented from IInputHandler: OnInputForClient and OnInputForBot. Before we get started, let's look at each of those methods:
OnInputForClient: Is used to collect inputs (from devices such as keyboards) for the current client. This input will be collected by Elympics and sent to the server, as well as executed locally. This method is the place, where all input devices should be queried and all input data should be saved toinputSerializer, so they can be deserialized and applied in the next step.OnInputForBot: If our game uses bots (as it should), this is the place to get the same inputs for our bots. The rules for this method are exactly the same as withOnInputForClient.
In most single player games written in Unity, it's usually easier to instantly apply effects of players' inputs to the game world in the
Updatemethod. However, when creating game with Elympics, it's crucial to separate those two distinct steps.Inputshould be understood as player's intention of doing something with the game world. This is what should be saved and serialized inOnInputForClientandOnInputForBotrespectively. Later, this intention should be transferred to the game world inElympicsUpdateusingElympicsBehaviour.TryGetInput, which is a separate step (it's a necessary distinction for technical reasons and parallel gameplay synchronization. Read more about reconciliation to dive deeper).
In our game we won't be creating any bots for now, so we'll focus on OnInputForClient.
OnInputForClient - implementation
Let's start by gathering player input and using it with previously described interface. First, let's move the whole Update method to OnInputForClient. The entire Update is not needed now, so we can get rid of it. The same applies to FixedUpdate – it can be safely deleted as well.
Our OnInputForClient should look like this:
public void OnInputForClient(IInputWriter inputSerializer)
{
    if (playerId == 0)
        movementY = Input.GetAxis("Vertical Player 0");
    else if (playerId == 1)
        movementY = Input.GetAxis("Vertical Player 1");
}
Creating a multiplayer game we don't need to distinguish which player is responsible for the certain input. It will be handled by Elympics and abstracted away. So we can change the implementation to just:
float movementY = Input.GetAxis("Vertical");
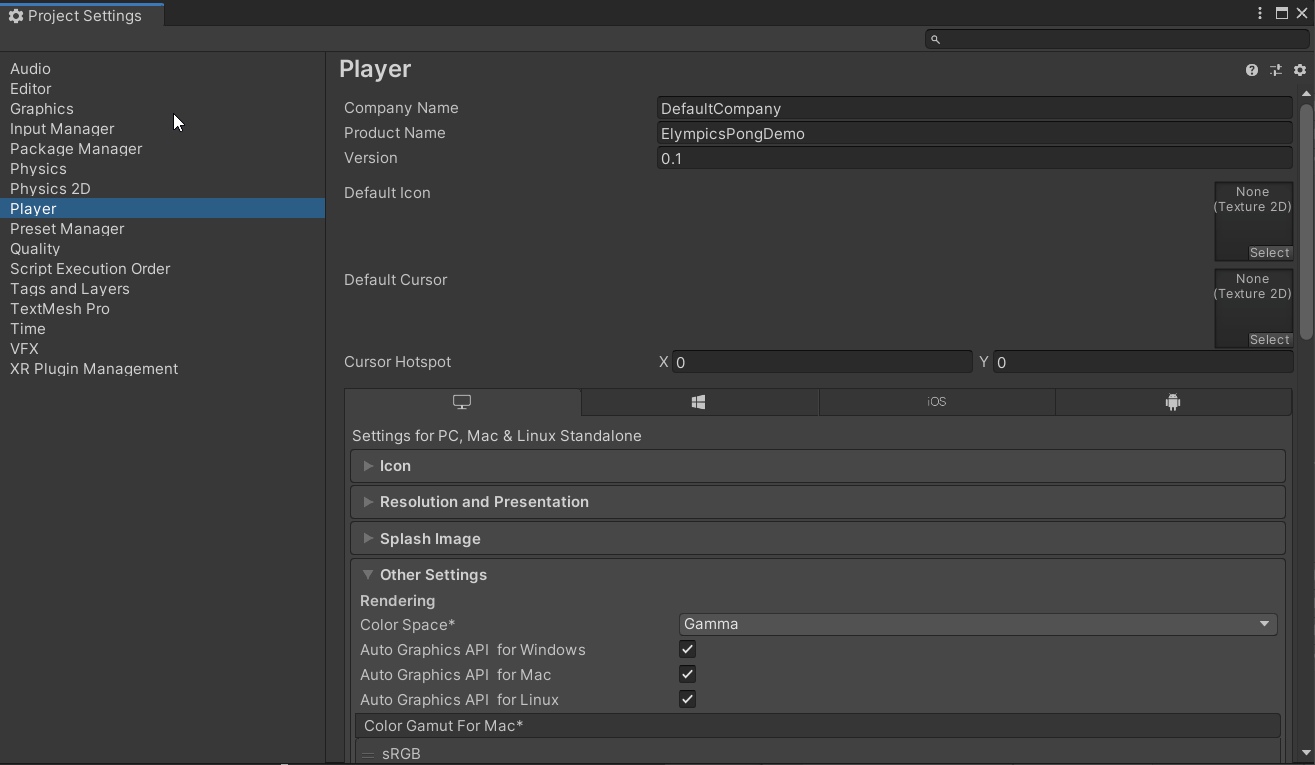
Remember to modify Input Manager for Unity. We'll no longer be using "Vertical Player 0" and "Vertical Player 1" – we'll just use "Vertical". You can modify it easily in Unity's input settings:
Edit->Project Settings->Input Manager.
Now, we need to do something with the input that we got from the system. Remember not to use this input right away. In OnInputForClient you just need to gather and serialize all inputs (intents). So let's do just that! In order to save this input for Elympics to send and use, we need to use inputSerializer provided to our OnInputForClient method. So we just need to add this line:
inputSerializer.Write(movementY);
That's it! 🎉
But we are not finished yet!
We have two pads on scene which means we will be sending two inputs everytime - one for out pad and one for the another (enemy). Of course we can add necessary checks when we will be applying these inputs, but we can also fix it now - how?
Just add these two lines at the start of the OnInputForClient method:
        if (Elympics.Player != PredictableFor)
            return;
By using PredictableFor we can easily identify each player, so we no longer need the playerId variable. Just remember to set predictability in every character’s ElympicsBehaviour to the chosen player.
Awesome! A few components have been significantly simplified in our implementation:
- We don't have to handle player identification with inputs gathering
movementYvariable can be a local variable. It won't be directly used to modify the game world. Instead, it will be serialized toinputSerializerand delivered to the server and clients by Elympics.- In project settings we just need one local input manager. Elympics will determine the correct input < > player assignment.
Congratulations! Player's input was saved, serialized, and automatically sent to the server!
The entire PlayerInputController should look as follows:
public class PlayerInputController : ElympicsMonoBehaviour, IInputHandler
{
    private PlayerMovement playerMovement = null;

    private void Awake()
    {
        playerMovement = GetComponent<PlayerMovement>();
    }

    public void OnInputForClient(IInputWriter inputSerializer)
    {
        if (Elympics.Player != PredictableFor)
            return;

        float movementY = Input.GetAxis("Vertical");
        inputSerializer.Write(movementY);
    }

    public void OnInputForBot(IInputWriter inputSerializer)
    {
    }
}
Applying input - Reading and applying players' inputs to the game world using ElympicsUpdate
Next key concept in Elympics is reading the previously saved input. We do that in ElympicsUpdate method by using ElympicsBehaviour.TryGetInput
Inputs should only be read inside ElympicsUpdate, as they are tick-synchronized and guaranteed to be present only in that context.
Remember that ElympicsUpdate needs to be implemented from IUpdatable!
Let's look at the reading input implementation:
public void ElympicsUpdate()
{
    var movementY = 0.0f;

    if (ElympicsBehaviour.TryGetInput(PredictableFor, out var inputReader))
    {
        inputReader.Read(out movementY);
    }

    playerMovement.ApplyMovement(movementY);
}
As we can see, ElympicsBehaviour.TryGetInput has two parameters:
ElympicsPlayer- the player that sent all the data regarding their input. It's used mostly when applying input to the object controlled by a certain player.out IInputReader- object storing input data saved previously to theIInputWriter.
In Pong we're just using one dimension of input (a single variable) – float - movementY. That's the only input sent to the server, and that's the only input that we're going to read from inputReader.
inputReader.Read(out movementY);
And just like that, we're reading information sent by players. It's important to read data in the same order that they were serialized in!
The next step is to check, if the input read is meant for this particular object. To do that, we'll use playerId variable, which stores player id who is responsible for controlling the particular pad. (Players are indexed starting at 0).
playerMovement.ApplyMovement(movementY);
From now on, we'll be able to move the pad from the player's editor in half remote mode! Each player will have their own assigned pad and will only be able to move that pad, using both arrow keys and w/s keys.
Before we test our work, we'll also need to update the pad prefab (player).
Player pad synchronization
Players are now able to move their own pads, sending movement data to the server. So, we'll need to synchronize the state of both pads. Fortunately, we already know how to do that! Let's open Player.prefab (located in Assets/Prefabs).
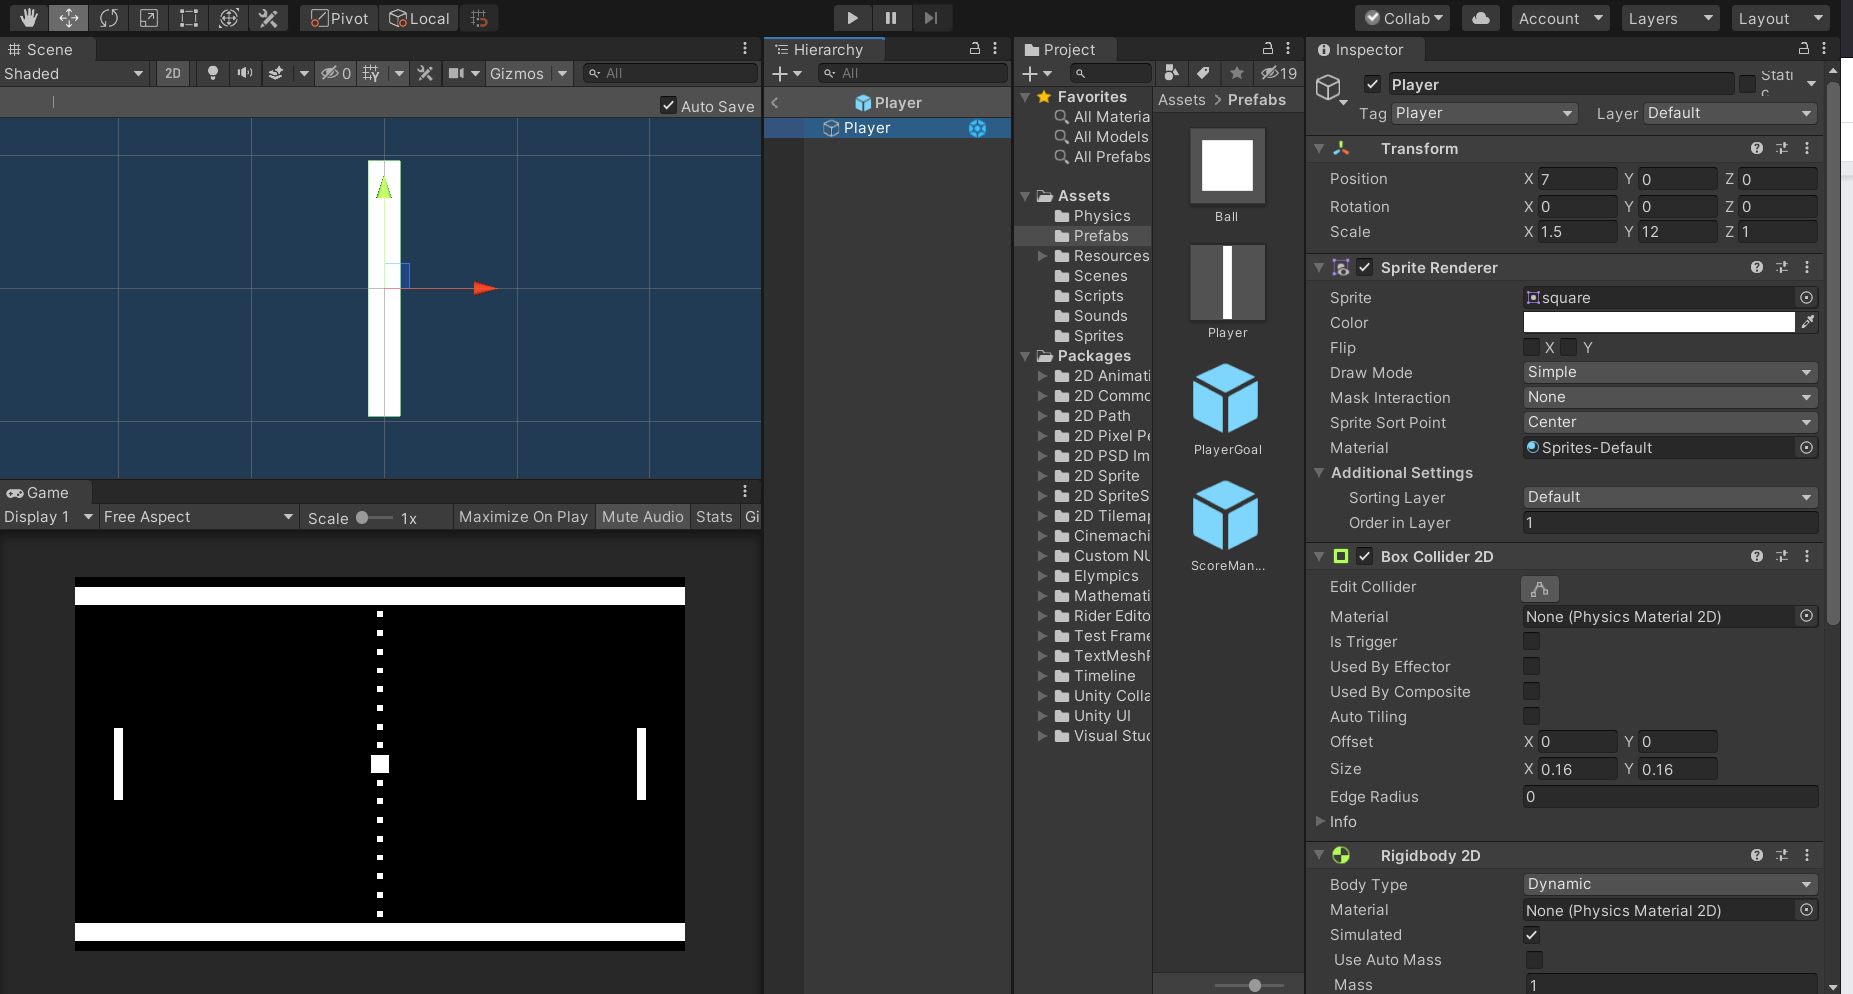
The first step, the same as before, is to add ElympicsBehaviour component, and then we'll add Rigidbody2D Synchronization in order to synchronize the pad object.
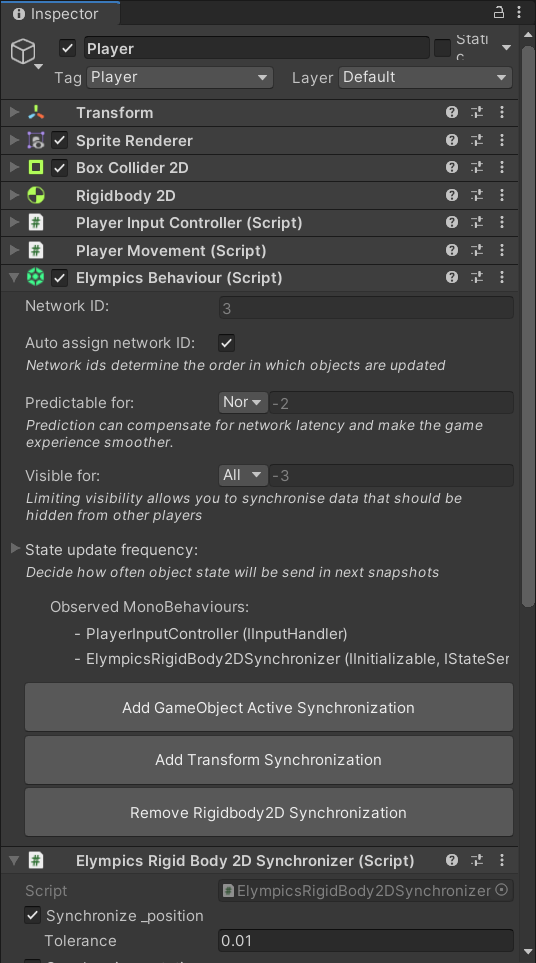
Note, that because of implementing
IInputHandlerinterface inPlayerInputController.cs, the number of observed Mono Bahriours inElympics Behaviourcomponent was changed.

If any object with ElympicsBehaviour is directly controlled by any of the players, it's always useful to add Prediction, so that player's actions are instantly visible on screen (with no roundtrip of data to the server). Read more about prediction in our Concepts article. So let's make the pad predictable for the player that controls it. Predictable for parameter is modified in ElympicsBehaviour and is set to None by default. Let's change that to Player.
The changes in Predictable for were applied in player prefab, but we still need to set those in specific instances. Let's mae sure, that Id of the player in the scene is the same as Id in PlayerInputController.cs – equal to the player that controls this particular pad.
Ready! 🎉🎉
From now on, whenever any player connects, they will be assigned to their own pad. They'll only be able to control it (with arrow and w/s keys). For half remote mode, the server is no longer able to move any of the pads directly.
Remember to test what we've done! We'll need one editor for the server, and two clones for both players (remember to uncheck Is Bot for player 1).
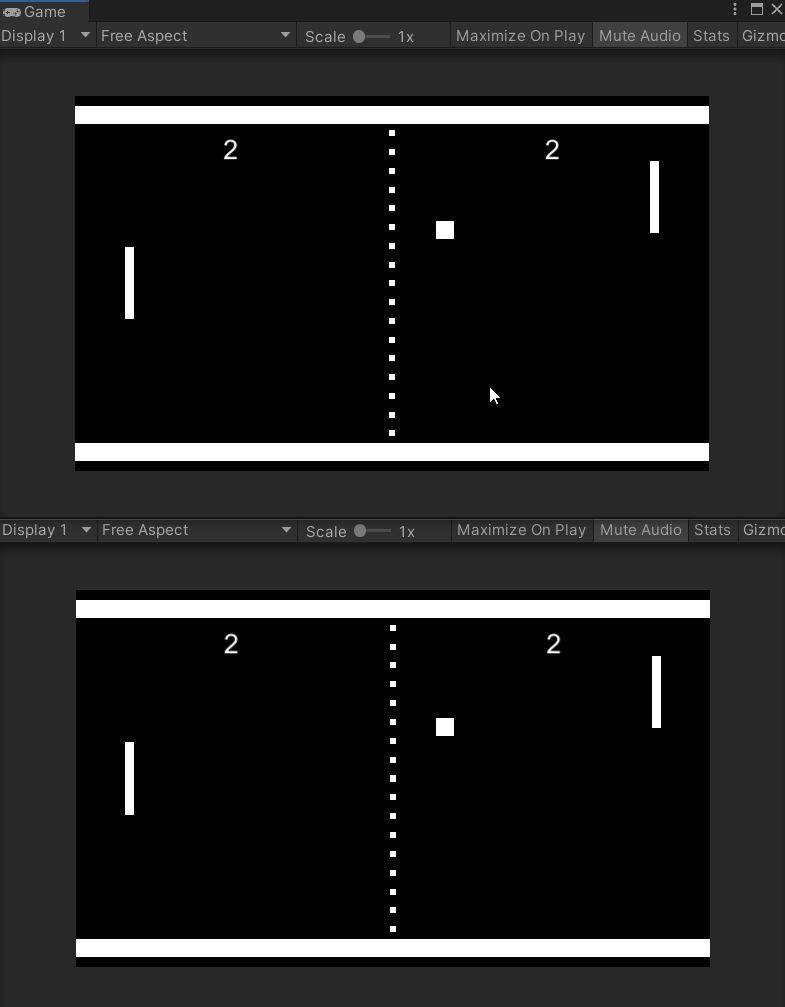
Top: Player 0, Bottom: Server
Congratulations!! 🎉🎉
We were able to create a fully synchronized multiplayer game using Elympics!
In the next part we'll explore using synchronized variables to save our match score in a deterministic and safe way!